FaLaLaLaLa! I’m a lunatic!
It’s okay to hate me for posting about CHRISTMAS right now, but hear me out. Every. Single. December. I’m like, “Wow, I’d really like to make x,y, and z (including desperately needed new ornaments), but LIKE THAT IS HAPPENING NOW. Pshaw.” And then I run out for more wrapping paper.
So I saw some craft groups I’m part of on Facebook starting to share these awesome tile to ornament transformations a few weeks ago, and I immediately saw them as a win-win to my 100+ degree woes right now. They are super fun crafts to do with the kids, relatively cheap, and come December, I’ll be like, “Wow, Jill. You were SO on top of things!”
Many of these craft groups are doing fancy designs with their vinyl cutters for these (I recently got a Silhouette Cameo), and they are amazing, but also not something people can do if they don’t have one of these costly machines.
So I made it my mission to come up with a couple cute ideas that ANYONE can do.

Supplies:
Sharpies
Spray paint (I used gold and Krylon’s Glitter Blast in red – obsessed with that stuff!)
Removable vinyl letters (look in the canvas and art supply section at the craft store)
Masking tape or vinyl (I used vinyl scraps, you can buy a roll at the craft store for about $8)
Felt, hot glue, and ribbon to finish off the back
Ceramic tiles

This sheet was about $7 at Lowes.

This box of 5 large tiles was $15 at Lowes.

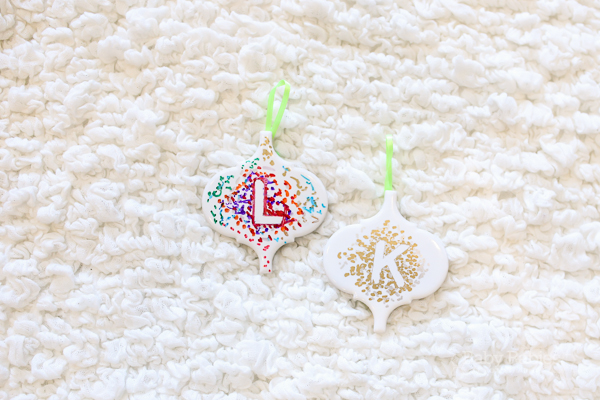
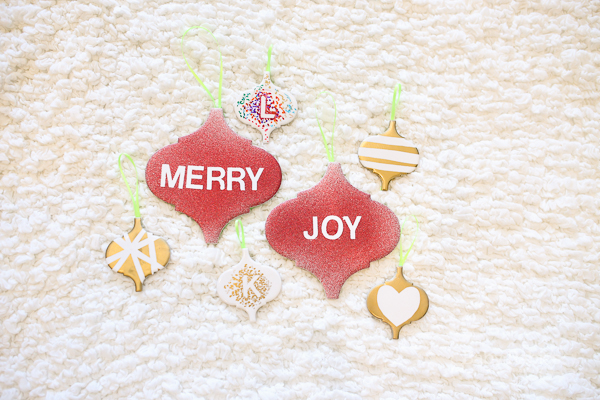
For our first project, we used the removable vinyl letters to spell words out on the big ones, and add initials to the little ones.
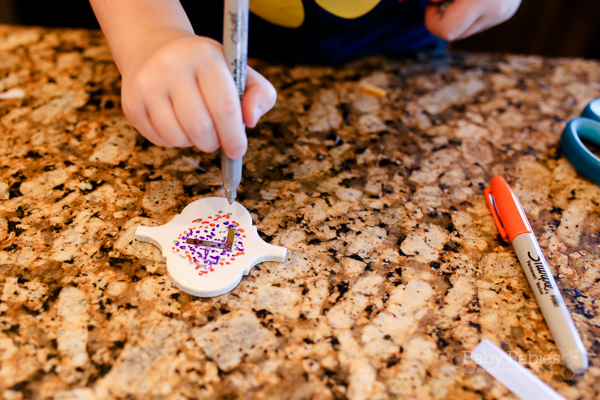
The kids did the dot-dot-dot Sharpie thing around their initials…

They look like this once we peeled away the stickers (and hot glued some felt and a ribbon to the back)…
I hit the big ornaments with a couple coats of Krylon Glitter Blast and got this look when we removed the letters…

Here’s a better look at the felt and ribbon on the back:

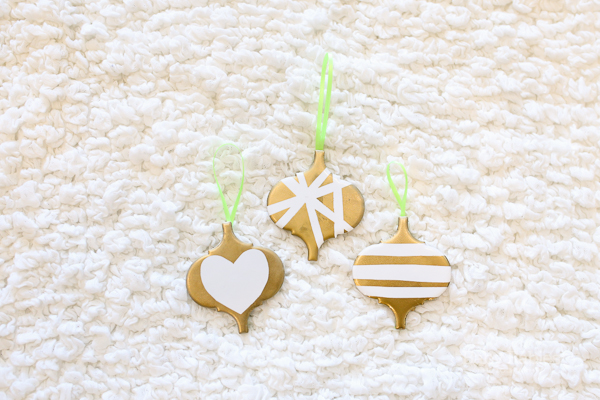
My personal favorites are the ones I’m going to use to decorate MY tree. I got an all white tree last year that goes in our front room.

I simply cut shapes and strips of vinyl, adhered it to the ornaments, then hit it with a few rounds of gold spray paint. Love!
There are so many other fun applications for these! We did a few decoupage with scrapbook paper I let the kids pick out, and even some printed pictures. We also tried this Sharpie water color look, but it didn’t work too well for us. I think we’ll just spray paint over them.
This has really inspired me to do more Christmas crafts… for now. I will have to put them all away in September so I can properly respect the pumpkin and the turkey.